

How to Install Vinyl Siding Around Windows
Did you know that about 30{5ab75762cf707683d7af2475431dd95a23fbc9cf5cb8a45517116f350cf35bde} of US homes have vinyl siding on them? Vinyl is also one of the cheapest options for siding, usually anywhere from $2 to $7 per square foot. On average, the cost of putting vinyl siding on a house is around $10,000.
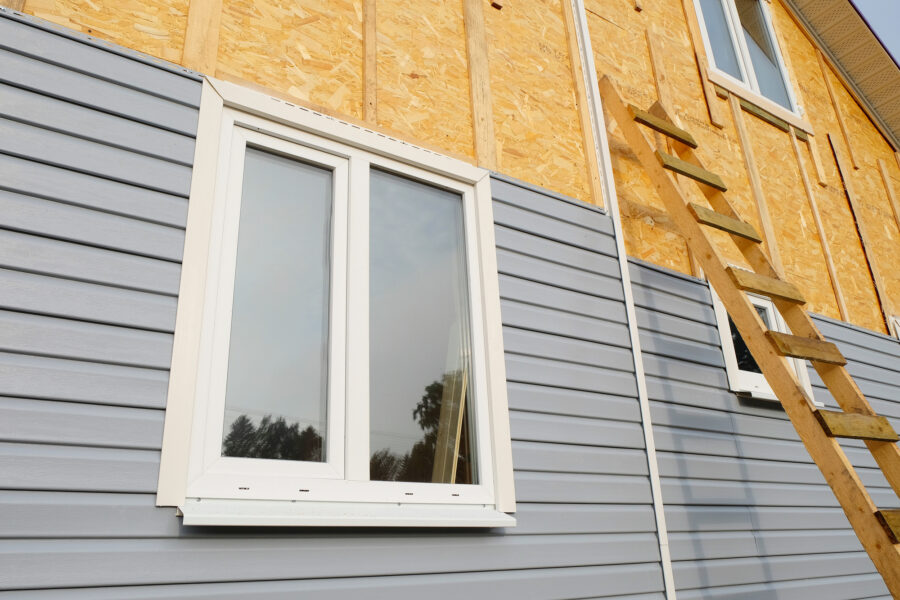
If you have been considering installing siding on your home, you want to make sure you get it done right the first time. Some of the most difficult parts of putting siding on your home are windows and doors. If you are wondering how to install vinyl siding around windows, keep reading this step-by-step guide to find out.
Steps for How to Install Vinyl Siding Around Windows
There are many benefits to installing new siding around your home, and there are many different options when considering which home siding is the right kind for you. Vinyl siding is one of the most popular, and for good reason. This kind of siding is easy to install, has low maintenance, and is the most cost-effective option.
However, the most difficult parts of installing vinyl siding are your windows. But, this doesn’t need to be difficult. Follow these easy steps for how to install vinyl siding.
Installing the Bottom J-Channel
To install vinyl around windows, you want to start by installing J-channels around them. These cause the siding that goes around your windows to look neater and gives them a complete look.
When installing your J-channels, you will want to start on the bottom first, then the two side pieces, and then the top. This is because the pieces will overlap to shed water properly.
Start by measuring your window frame, being sure to include the overlap from the channels in the measurement. Use a square to get the angles down right and cut with aviation snips.
After you have the measurements correct, use a J-channel cutter or your aviation snip to create a notch in the J-channel that will be on the bottom of the window. This notch will be the same length as the overlap.
Once the notches are placed in the J-channel, you can start attaching it. To do this, you will want to make sure the slots of the nails are facing outward from the window. Starting in the middle slot, start nailing your J-channel in.
Installing the Side J-Channels
Next, you will start on the side J-channels. Once again, you will want to measure your window and add enough overlap to fit firmly into your bottom J-channel. When you create the notch for the side J-channel, you will want to make sure the top notch is cut off, but for the bottom, you will want to use your tools (either a J-channel cutter or aviation snips) to create a tab.
You can use a square or other tool and cut an angle into the corner of the side J-channel. After that, you can slide that tab into the bottom J-channel until it fits in. Once that piece is comfortably connected to your bottom channel, you can begin nailing in your side J-channel.
Once completed, repeat the process on the other side of the window.
Installing the Top J-Channel
When you begin the top of the window, you will want to start by installing a drip cap. This allows any water that is to come down on the window to be diverted outward away from the window. Once you have that piece nailed in, you will start the process of installing the last J-channel.
To do this, you will want to have tabs cut into both ends that will be slid into the side J-channels, and you will also want to cut an angle on both sides. This helps keep the water out of the cracks.
The Finished Product
Once you have installed the J-channels, you can install your vinyl siding. The J-channel will allow you to neatly slide your vinyl into place and install them without needing to worry about your edges. Knowing how to install vinyl siding around windows helps make an important step in the process much easier.
Feel free to keep browsing this section for our latest.
